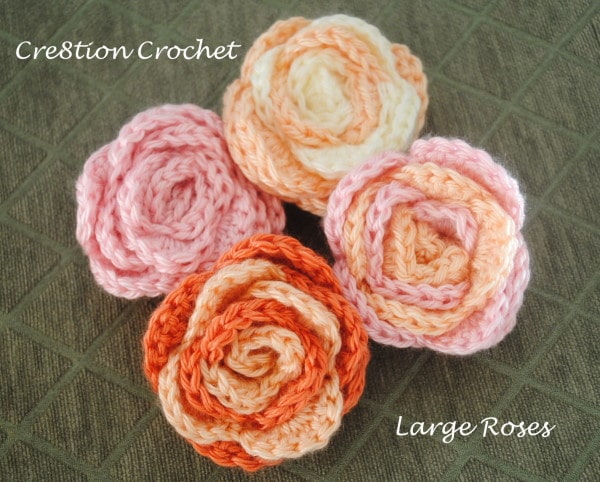
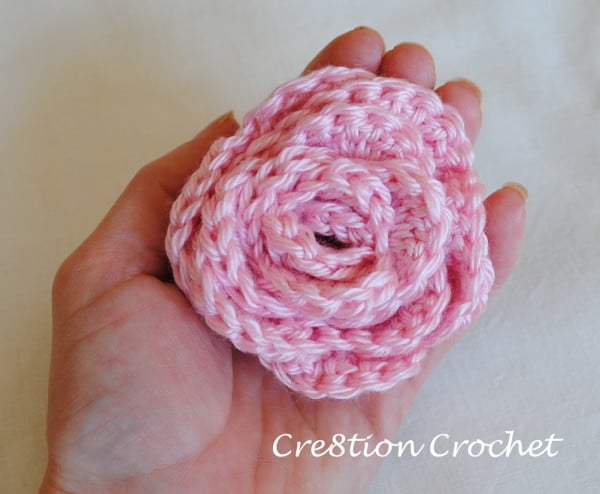
Large Roses
free crochet pattern
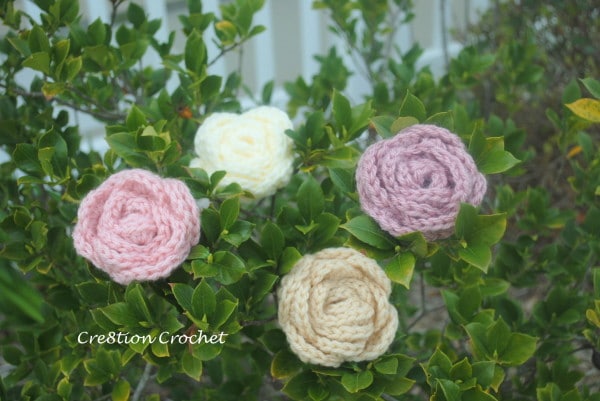
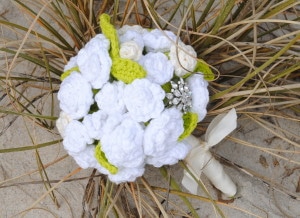
These large roses are perfect for wedding flowers. This free crochet pattern can be made into a bouquet or just placed loosely around your wedding party tables for a sweet and romantic feel. They can be made in either multi colors or in a monochromatic color scheme. This rose pattern was whipped up for a wedding I am in the process of designing for a client (I ended up choosing different yarn, pic at bottom of post). I wanted something different than what I had done with my previous bridal bouquet design.
The pattern is written with the color changes to make your rose two toned. If you want a single color you can follow the same pattern without the color changes.
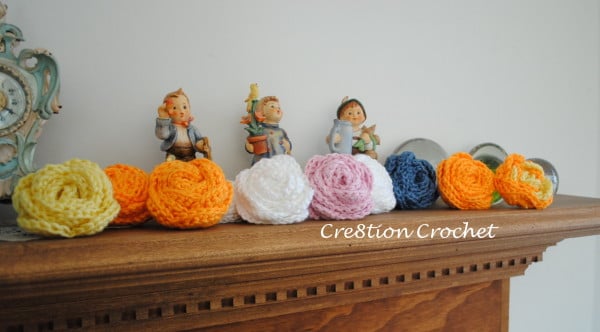
Stay tuned for future posts on my new bridal bouquet and my sweet spring/summer wreath pattern. The possibilities are endless for ways to use these sweet large roses. Right now mine are adorning my mantle.
Materials:
Simply Soft Yarn in any color(s)
5.5mm (I) hook
tapestry needle

Abbreviations and Stitches used:
CA– Color A
CB– Color B
st– stitch
sp– space
mc/r– magic circle/ring- watch my video tutorial HERE
sl st– slip stitch
insert hook into stitch or space, yarn over, pull through stitch, (two loops on hook), pull loop closest to hook through other loop
ch– chain
sc– single crochet
insert hook into stich or space, yarn over, pull through stitch (two loops on hook), yarn over, pull through both loops
hdc– half double crochet
yarn over, insert hook into stitch or space, yarn over, pull through stitch (three loops on hook), yarn over, pull through all three loops
dc– double crochet
yarn over, insert hook into stitch or space, yarn over, pull through stitch (three loops on hook), yarn over, pull through first two loops on hook, yarn over and pull through last two loops
tc– triple crochet
yarn over TWO times, insert hook into stitch or space, yarn over, pull through stitch (four loops on hook), yarn over and pull through first two loops on hook, yarn over and pull through two more loops on hook, yarn over and pull through last two loops on hook
No guage
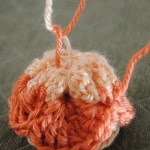
Finished size
Approximately 3” but size will change depending on yarn used
Pattern:
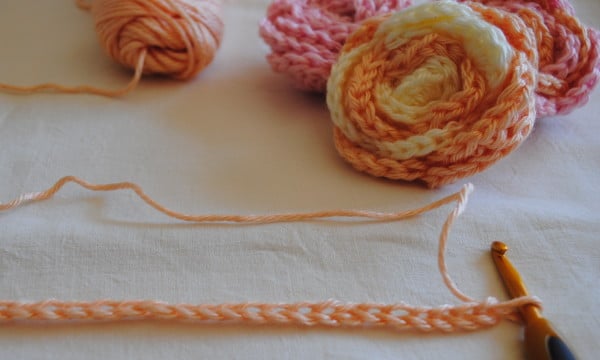
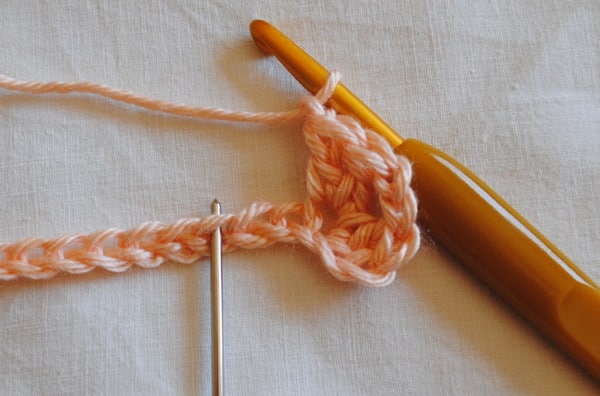
1- Using CA. Leave long (18-20” tail) Ch52
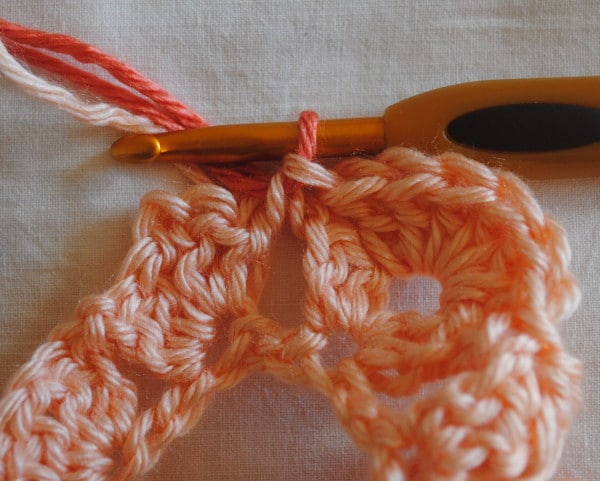
2- 1dc in 4th ch from hook, ch2 and 2dc in same space. *Ch1 and skip 2 ch sps. [2dc, Ch2, 2dc] in same chain space. Repeat from * till end. <17 clusters>

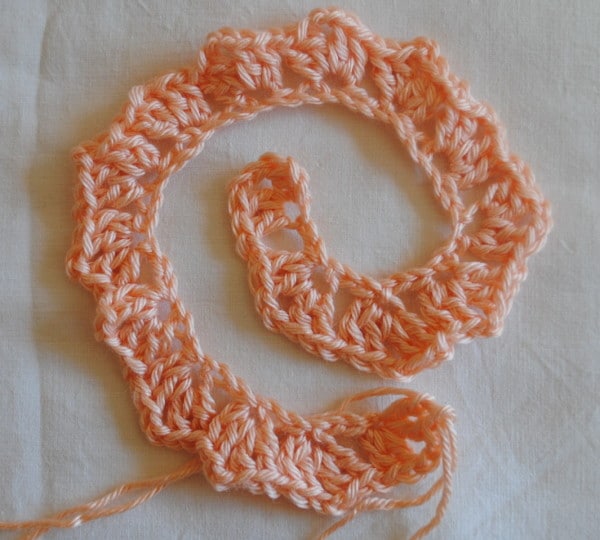
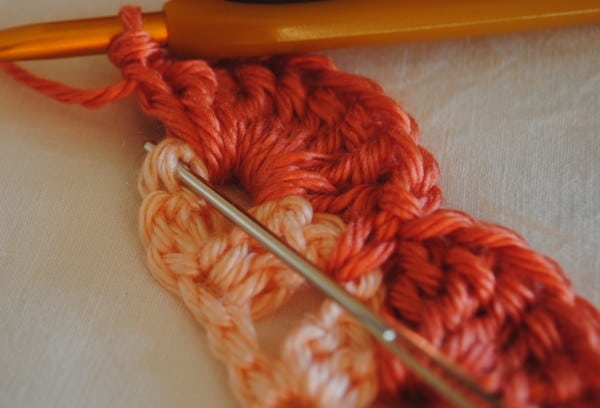
3- Turn and 5hdc in first cluster. 1sc in sp between clusters. * 5hdc in next cluster. 1sc in sp between clusters. Repeat from * one more time. <3petals> On last sc change to CB. To change color begin your sc as normal. Insert hook into sp, yarn over and pull through sp (two loops on hook) use NEW color to yarn over and pull through both loops on hook. You will now have the new color on the hook. Leave each tail about 6” long. Tie short tail of CA and CB together tightly to secure (you will stitch them in later)
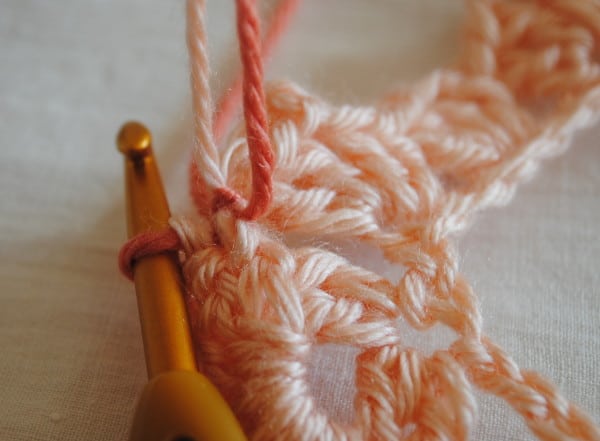
4- *6dc in next cluster. 1sc in sp between clusters. Repeat from * two more times <3petals>. On last sc change back to CA.
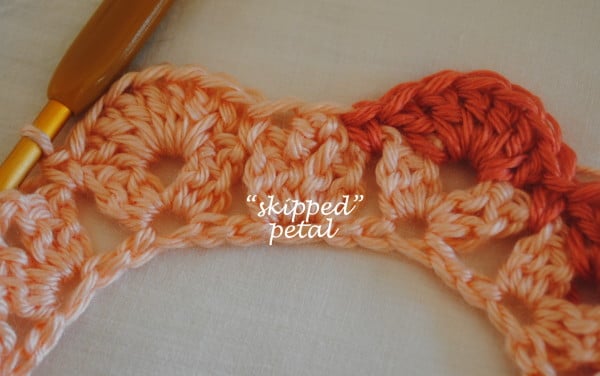
You will be “skipping” the next cluster, this is to break up the pattern so that the future petals do not cup or lay behind the previous petals when you assemble flower.
5- (here you will be “skipping” one petal, this is done to ensure that the petals don’t line up perfectly and “cup” each other when you wind them up) 1sc in next cluster. 1sc in sp between clusters. *7dc in the next cluster. 1sc in the sp between clusters. Repeat from * 3 more times <4petals>. On last sc change back to CB.
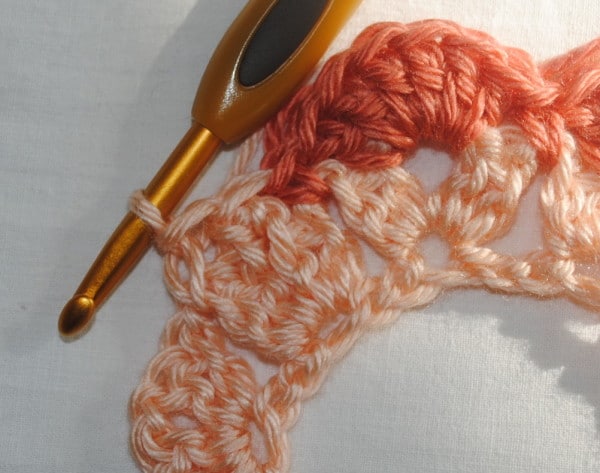
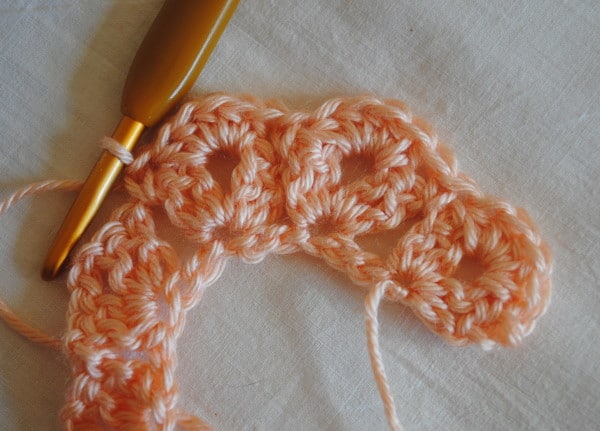
6- Skip the next petal again (1sc in the cluster space, the same as the last skip) . 8dc in next cluster. 1sc in sp between clusters. *8tc in next cluster. 1sc in sp between clusters. Repeat from * till end. In last cluster add 1dc, in the space between the dc’s of previous row stitch 1hdc. In chain of first row stitch 1sc. Leave long (18-20” tail) and fasten off with sl st. <5petals>.

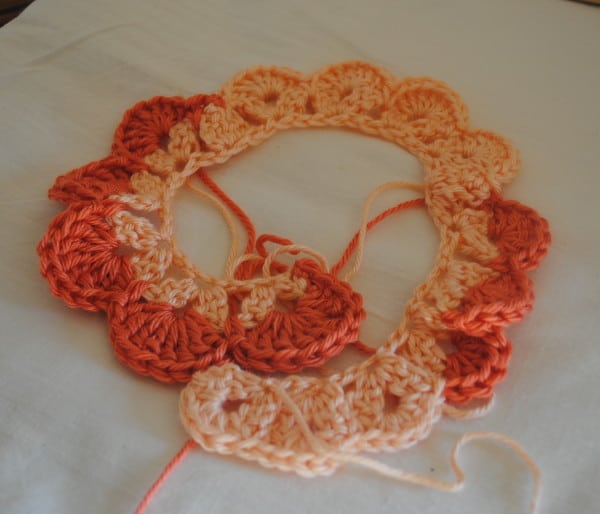
7- Re tie short tails at color changes to ensure they are secure. Weave CA into the adjoining CA petal and CB into the adjoining CB petal (weave in both directions to make sure it will not come loose) and cut short.
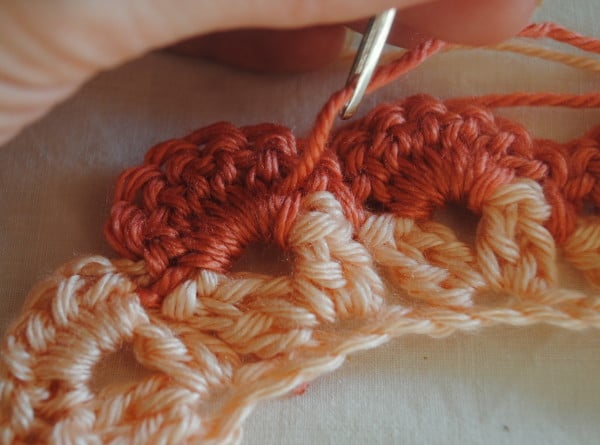
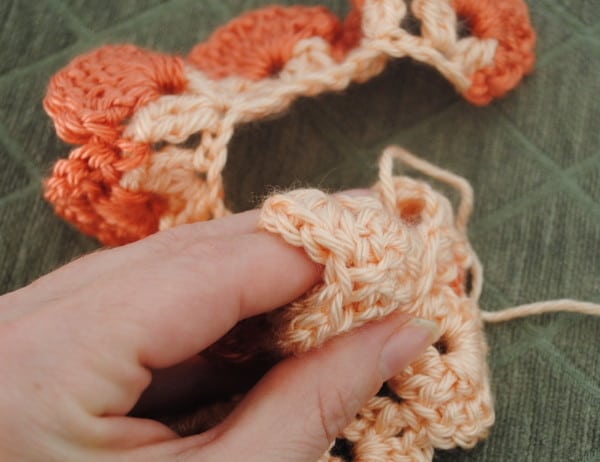
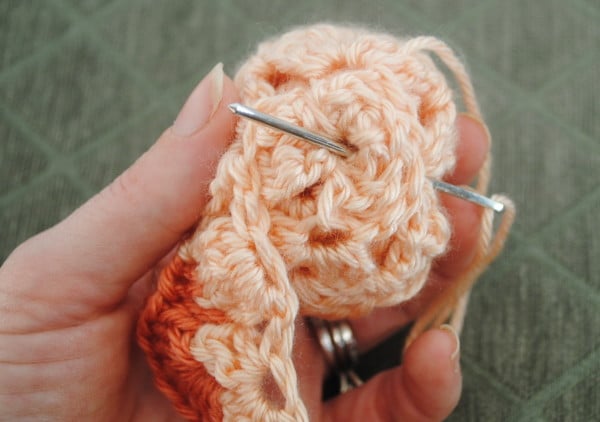
8- Weave first tail (CA side) through embroidery needle and begin to wind flower up (starting with three CA petals). Wrap petals around your finger for even spacing. Leaving your finger in place stitch up three petals. Only stitch the outside layers, be sure not to stitch the opening in center closed (why I recommend keeping your finger there as a guide)
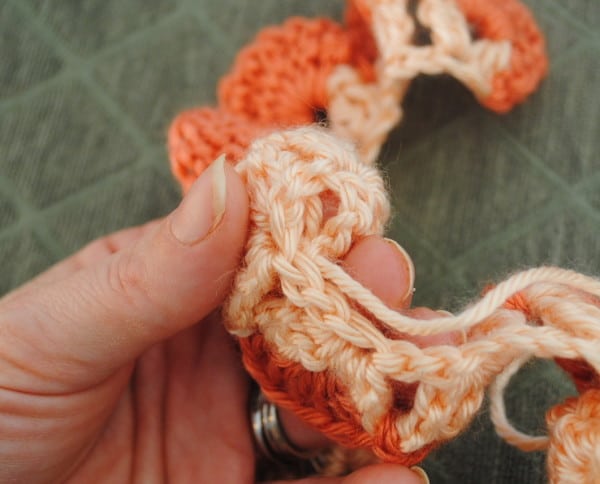
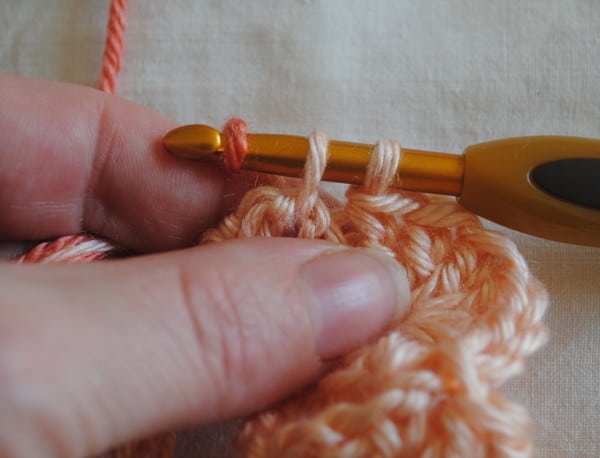
9- Wrap the next set of petals, making sure the petals are not cupping or overlapping and stitch in place. Repeat till all petals are wrapped.
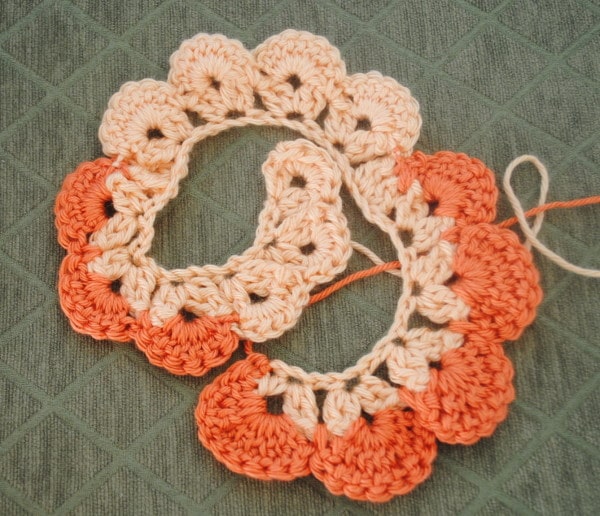
10- Using the other tail (CB) stitch the petals in place. Insert needle through the back of the last row of petals to the front of the second row of petals (CB to CB), do not go into the first three petals. Repeat around.
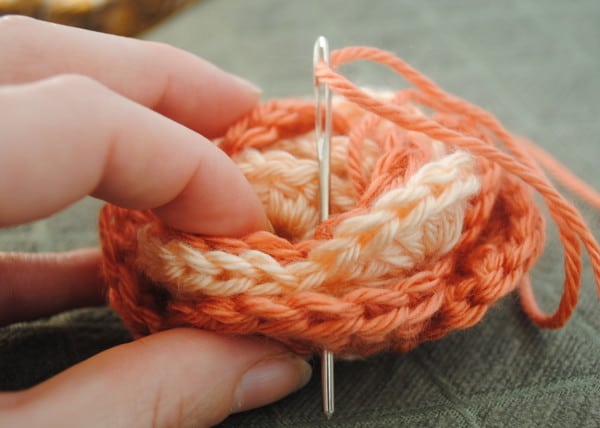
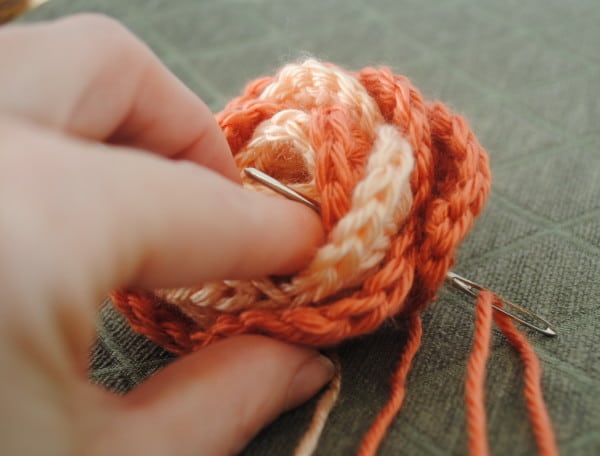
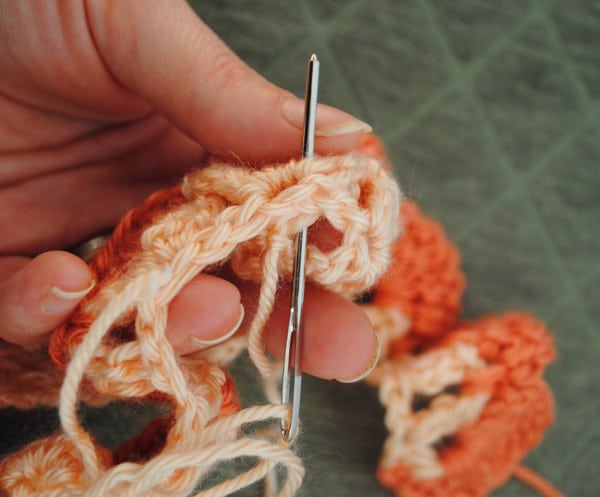
11- Tie both tails together on bottom of flower and weave the tails between the petals and cut short.

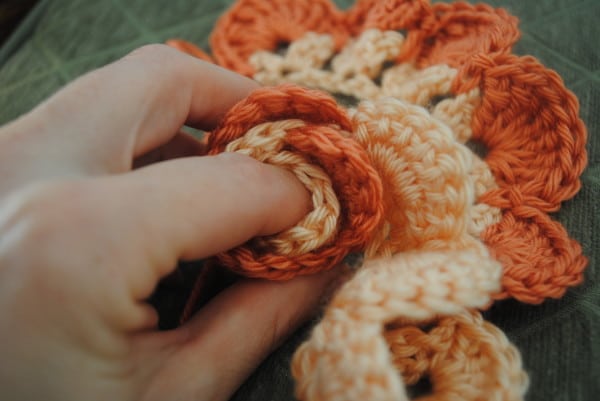
You can make the same rose in one single color (crochet the same, skipping color changes) for a different result.
Different yarns will give you different results as well. This is a pic of a large rose made with Vanna’s Choice yarn… these will become Emily’s roses for her bridal bouquet.
You may also enjoy this Bridal Boutique and Boutonniere pattern

Or the Flower Repository where you can find a bunch of FREE crochet flower patterns

I hope you enjoyed this free crochet pattern, Large Roses. If you like what you see, please share. Have fun, and as always…
Happy Hookin’


