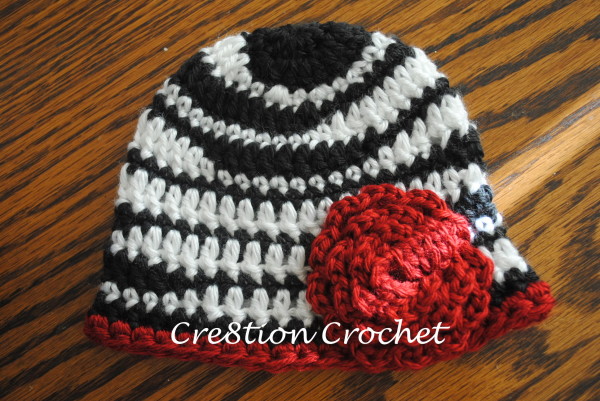
Free Newborn Zebra Hat Pattern
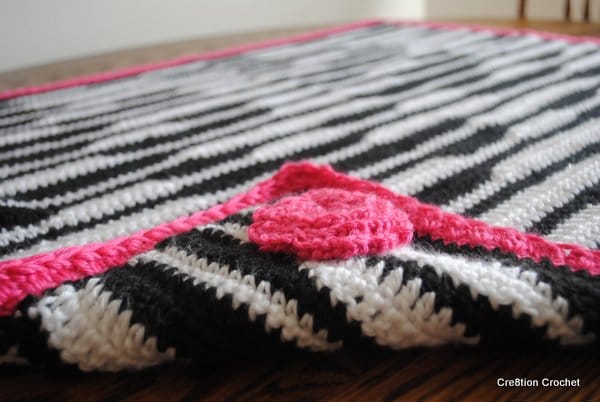
This hat is designed to accompany my free Zebra Newborn Blanket. This pattern will soon be released in a variety of sizes. The Newborn size is the first of the series.
Unlike other zebra stripped hats, my free zebra newborn hat pattern is extremely varied and is not uniform in stripes. Each row is slightly different giving a unique finish. The border of the hat is also unique and adds that extra touch.
Abbreviations and Stitches used:
St(s)– stitch(es)
sp– space
ch– chain
mc/r– magic circle/ring (mc/r tutorial and video HERE)
sl st– slip stitch
insert hook, yarn over, pull through, (two loops on hook), pull loop closest to hook through other loop
sc– single crochet
insert hook, yarn over, pull through (two loops on hook), yarn over, pull through both loops
hdc– half double crochet
yarn over, insert hook, yarn over, pull through (three loops on hook), yarn over, pull through all three loops
dc– double crochet
yarn over, insert hook, yarn over, pull through (three loops on hook), yarn over, pull through first two loops on hook, yarn over and pull through last two loops
scb– single crochet bobble
insert hook in st, yo, pull through st, yo and pull through 1st loop only. Insert hook in same st, yo, pull through st (three loops on hook), yo and pull through all three loops
Materials:
5.0 mm hook (or hook need to obtain gauge)
Caron’s Simply Soft or Bernat Satin in Black (color A) and White (color B), or any colors of your choice
and border color (of choice)
(you may use any yarn to complete this project but I can’t say what size it will end up)
tapestry needle to weave in ends
Notes:
I use a seamless method in this pattern (details are in the pattern) this will give the hat a seamless look and all the color changes will line up perfectly. If you are not familiar with this method please view my tutorial and video HERE.
I do not cut my yarn throughout to prevent having to weave in lots of ends but I don’t carry it, I pick up the new color and leave the old color hanging, and then reverse steps for the next color change. You can cut each color change if you like, it will not affect the finished product.
The first 4 rounds (increasing rounds) are slightly more complicated than the rest of the pattern as they require lots of changing stitches. It will get easier after you complete the increasing rounds. It may be easiest to print instructions out and cross them off as you go along.
Stitch counts are at the end of each round in <> brackets.
Gauge:
1st 4 rounds = 4 inches
Finished hat size:
12.5” circumference
4.75-5.0” height
nearly 6” wide at widest part
Pattern:
- Starting with color A (black)
Mc/r with 10hdc - With same color (color A)
Ch2. Skip 1st. 2dc in each of the next 4 sts. 1dc and 1 hdc in next st. 2sc in each of the next 4 sts. 1sc and 1hdc in last (empty) st. sl st into the 1st dc to join round. Change color on sl st. ^see notes <20>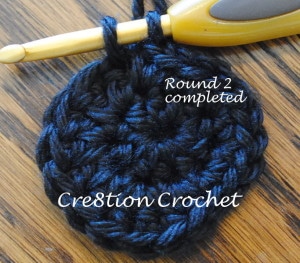
- With color B (white)
Ch2. Skip 1 st. [1sc in next st. 2sc in next st] 3x. 1sc in next st. 1hdc and 1dc in next st. [1dc in next st. 2dc in next st] 4x. 1dc in next st. 1hdc and 1sc in next st. 1sc in next st, 2sc in next (empty) st. sl st into the 1st sc to join round. Change color on sl st <30> - With color A (black)
Ch2. Skip 1 st. [1sc in each of the next 2sts. 2sc in next st] 4x. 1sc in each of the next 2sts. 1sc and 1hdc in next st. [1dc in each of the next 2 sts. 2dc in next st] 4x. 1dc in each of the next 2sts. 1dc and one hdc in next (empty) st. sl st into the 1st sc to join round. Change color on sl st. <40>
Change color on sl st. <40>
- With color B (white)
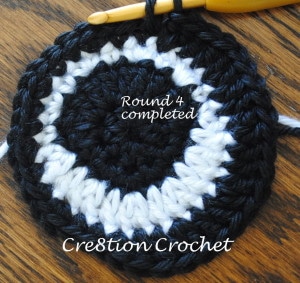
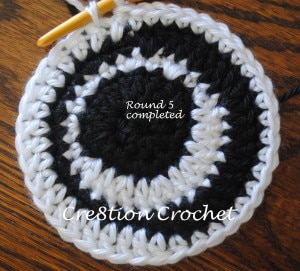
Ch2. Skip 1 st. 1dc in each of next 19 sts. 1hdc in next st. 1sc in each of next 19 sts. 1hdc in the st previously left empty. sl st into the top of the 1st dc to join round. Change color on sl st. <40>
Measured flat circle should be 4”
- With color A (black)
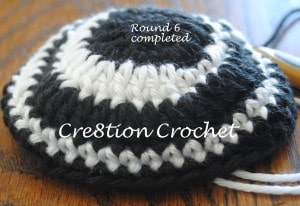
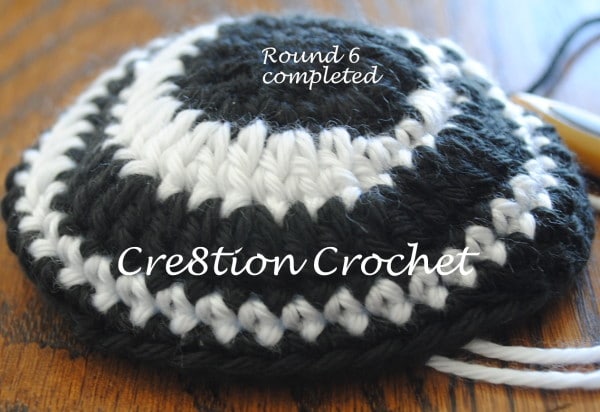
Ch2. Skip next st. *1sc in each of the next 9 sts. 1hdc in next st. 1dc in each of the next 9 sts. 1hdc in next st. Repeat from * to end. The last hdc will be placed in the s previously left empty. sl st into 1st sc to join round. Change color on sl st. <40>
Hat will begin to curve inward
- With color B (white)
Ch2. Skip 1 st. *1dc in each of the next 9sts. 1hdc in next st. 1sc in each of the next 9 sts. 1hdc in next st. Repeat from * to end. Last hdc will be placed in the st previously left empty. sl st into top of the 1st dc to join round. Change color on sl st. <40>
- With color A (black)
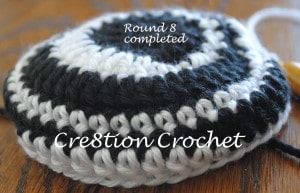
Ch2. Skip 1 st. 1dc in each of next 19 sts. 1hdc in next st. 1sc in each of next 19 sts. 1hdc in next (empty) st. sl st into top of 1st dc to join round. Change color on sl st. <40> - With color B (white)
Ch2. Skip 1 st. 1sc in each of the next 19 sts. 1hdc in next st. 1dc in each of the next 19 sts. 1hdc in st previously left empty. Change color on st st. <40> - With color A (black)
Ch2. Skip next st. *1dc in each of the next 9 sts. 1hdc in next st. 1sc in each of the next 9 sts. 1hdc in next st. Repeat from * to end. Last hdc will be placed in the st previously left empty. sl st into 1st dc to join round. Change color on sl st. <40> - With color B (white)
Ch2. Skip 1 st. 1sc in each of the next 9sts. 1hdc in next st. 1dc in each of the next 9 sts. 1hdc in next st. sl st into top of the next sc to join round. Change color on sl st. <40> - With color A (black)
Ch2. Skip 1 st. *1dc in each of next 19 sts. 1hdc in next st. 1sc in each of next 19 sts. 1hdc in the st previously left empty. sl st into top of 1st dc to join round. Change color on sl st. <40> - With color B (white)
Ch2. Skip 1 st. 1dc in each of the next 18 sts. 1hdc in next st. 1sc in each of the next 19 sts. 1hdc in next st. 1dc in next (empty) st. sl st into the next dc to join round. Change color on st st. <40> - With color A (black)
Ch2. Skip 1 st. 1hdc in every st around. Last hdc will be placed in the st previously left empty. sl st into the 1st hdc to join round. change to border color on sl st <40> - 1scb in each st around. Join round with sl st. Fasten off and finish with my invisible finish.
Weave in all ends


If the hat is for boy I recommend doing this row in one round of sc instead as the scb is more fancy and girlish.
Add flower or other embellishment as desired
The flower I used was adapted from the Mermaid Tears Purse video tutorial by Bernhart
Flower Pattern:
Using a 4.0mm hook and Caron’s Simply Soft or Bernat Satin in border color
- Ch2
- 6sc in 1st ch, join with sl st
- In front loops only *3hdc in 1st st. 1sl st in next st. repeat from * around. <3 petals>
- In back loops – 2sc in each st. Join with sl st <12>
- In front loops only *3hdc in 1st st. 1sl st in next st. repeat from * around. <6 petals>
- In back loops – *1sc in 1st st. 2sc in next st. Repeat from * around. Join with sl st <18>
- In front loops only *3hdc in 1st st. 1sl st in next st. repeat from * around. <9 petals>
- In back loops – *1sc in 1st st. 1sc in next st. 2sc in next st. Repeat from * around. Join with sl st <24>
- In front loops only *3hdc in 1st st. 1sl st in next st. repeat from * around. <12 petals>
- Fasten off leaving 12” long tail
- Secure flower to hat
This pattern is also available as a PDF for the cost of $2. This fee is to offset revenue lost when the pattern is printed and a visit to this site is not required. Click HERE to go to Ravelry.
I hope you enjoyed making this Free Zebra Newborn Hat pattern with me! More sizes to follow soon. Don’t forget to also check out my Zebra Blanket to make a matching set.