Seamless Crochet Rounds
Here at cre8tioncrochet.com we will be adding a new weekly feature. Every week we will post a new helpful hint or trick to help you along in your crocheting. This week will be how make hats (or any item made in the round) seamlessly and how to seamlessly change colors. There are three seamless crochet methods that I use. You can also check out my video for the magic circle/ring to start your crochet hats or rounds.
1- The first method is used for any work done in sc or hdc (though I prefer the other method for hdc) in one color. When you start a new row do not begin with a chain (ch1 or ch2 depending on the type of stitch), simply begin crocheting along the row. When you complete the round (to the total amount of stitches called for in pattern) just sl st into the first stitch you made. This method will only work with sc and hdc and works the best with sc. However if you are changing colors in a sc or hdc round I recommend using the second method listed below for all color changes.
To change colors you would pick up the new color when there are two loops remaining on your hook from previous color. When changing colors in the round you would start your sl st to end the round and when you have two loops on your hook, instead of picking up the color you are currently working with, pick up the color you want to change to, sl st the new color into the loop on the hook of the old color, then begin crocheting your next round. If you are changing colors in the middle of a row you would also pick up your new color when there are two loops remaining on your hook in the last stitch of the current color.

2- The second method is best used when changing colors in any stitch or when working in hdc or dc. To start a new round ch2. Then you will skip the first space. Crochet your first stitch into the second space and continue to crochet the entire round (start your count on the 1st stitch you crochet). When you get to the last stitch called for in the pattern you will crochet that stitch into the space you previously left empty (after the ch2 you began the round with). Then sl st into the top of the next stitch to finish the round. This will look even better if you sl st into the back loop only of the stitch to finish. Every space, including the space the ch 2 was completed in will be stitched into.
Picture Tutorial
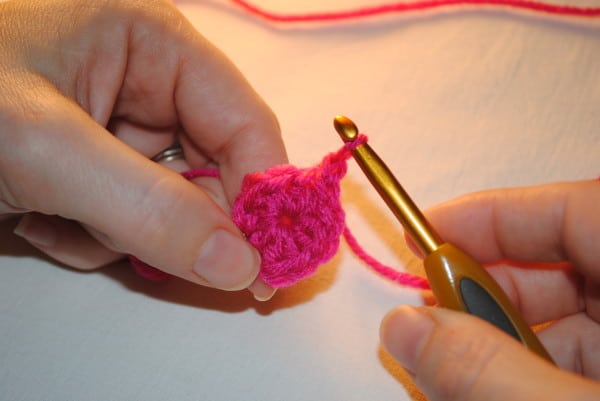
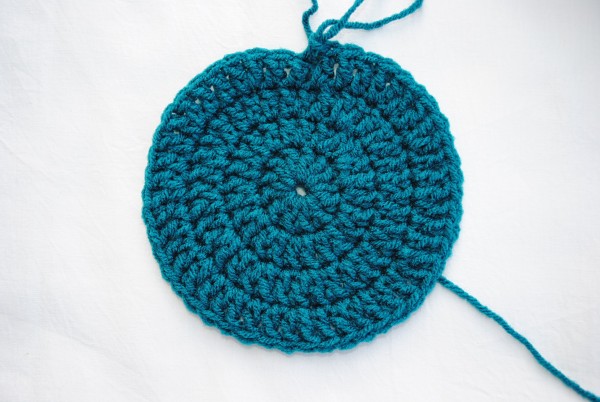
start with a magic circle or ring (you can watch my video on how to create a magic circle or ring here), with the stitches for the first round. After you sl st to join the first round you will chain 2
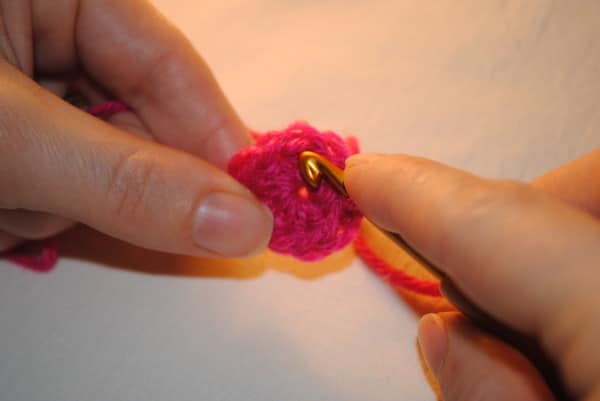
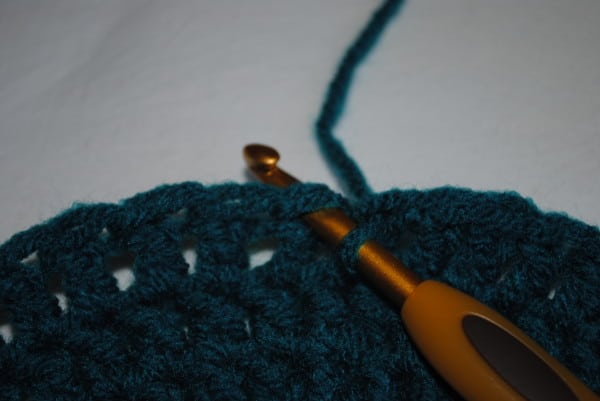
skip one space (and leave empty) and then place your first stitch into the next st
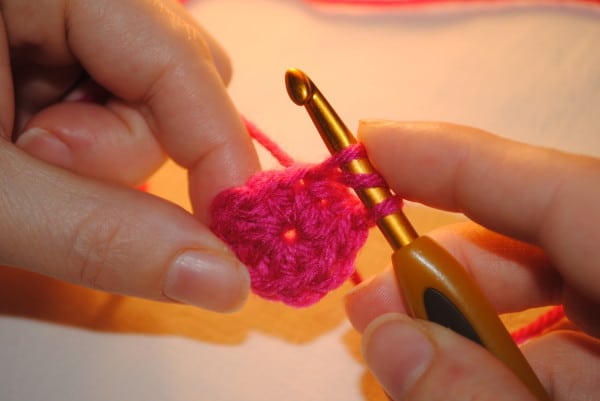
stitch all the way around
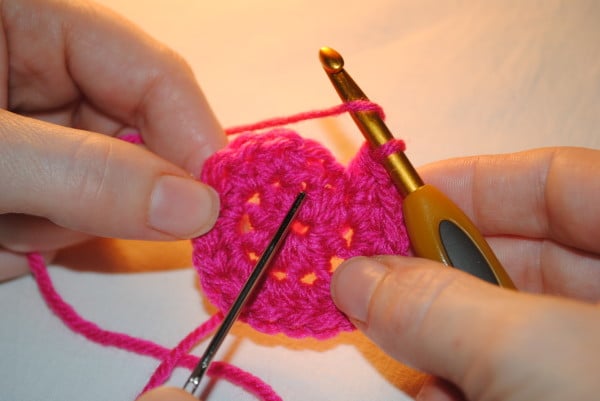

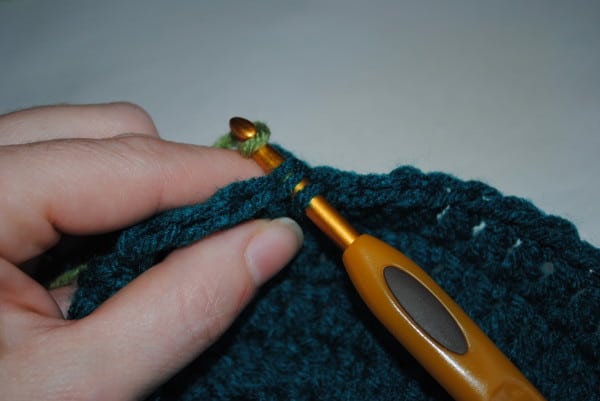
place your last stitch into the space you previously left empty (not the chain2, but the actual empty stitch from the previous round)
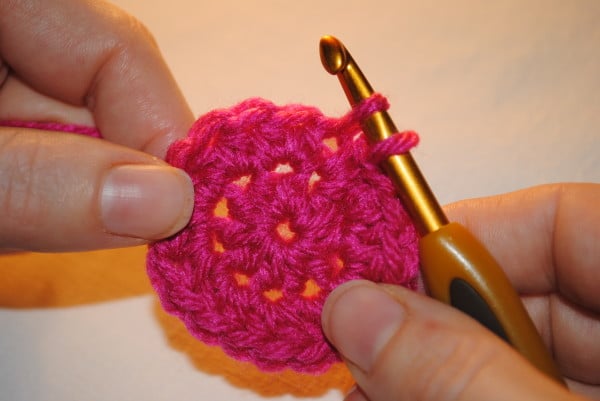
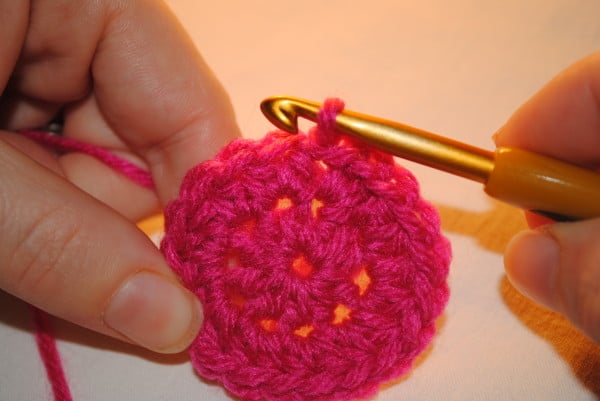
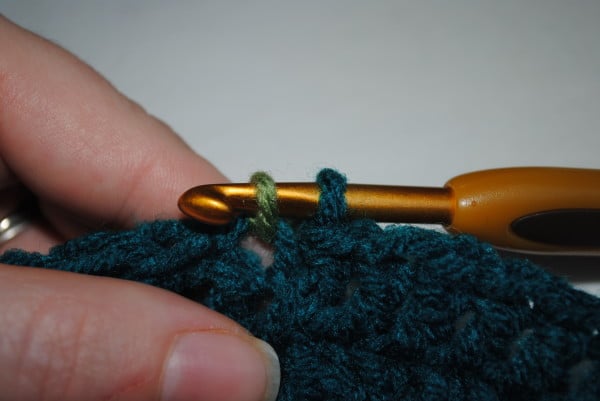
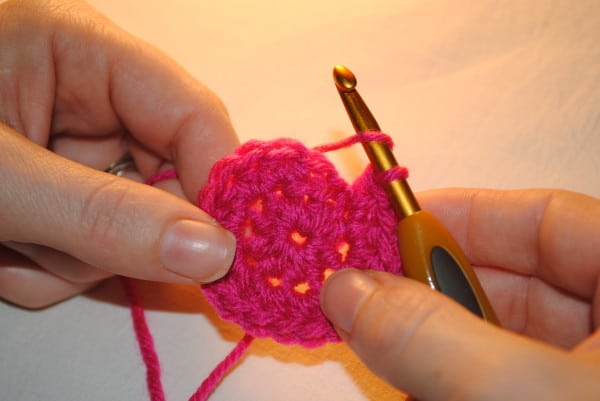
sl st into the first stitch of the round, viola one seamless round completed
3- This method can be used with any stitch but works best when you are not changing colors. This method involves adding an extra chain to the beginning of each round that will not count as a stitch towards your pattern. If you are using sc or hdc you will chain 1. If you are using dc or tc you will chain 2. To begin a new round you will chain 1 (or2), remembering not to count it towards the stitches in your pattern. Then you will place your first stitch in the round. Continue around, and when you finish placing all of your stitches you should end up behind the stitch where you chained. You will skip over this chain and slip stitch into the top of the first actual/counted stitch of the round.
I also recommend using my Invisible Finish to end your piece for a truly professional looking finished item.
You can also find other crochet tutorials and videos here –> Tutorials on Cre8tion Crochet
I hope you enjoyed learning the three seamless crochet methods that I use. My favorite is method 2, partly because I designed it but also because I think it works the best and is very versatile. If you have any questions on any of the methods please feel free to comment or email me at [email protected]. I will get back to you shortly.
Have fun and always…
Happy Hookin’


